
Krymp Photoshop-billeder - så det fungerer
Hvordan du kan reducere et billede i Photoshop til en ønsket størrelse, forklarer vi her i vores instruktioner.
Krymp billeder i Photoshop - i 5 trin
- Åbn menuen "Billede" i proceslinjen, og vælg menupunktet "Billedstørrelse". Alternativt kan du også trykke på tastekombinationen [Alt] + [Ctrl] + [I].
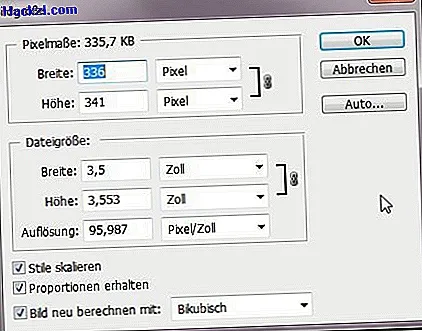
- Nu åbnes dialogvinduet "Billedstørrelse", der er opdelt i to områder: I det øverste område vises pixeldimensionerne, i det nederste område kan du se længdedimensionerne på dit billede. Dette er især nyttigt, hvis du vil udskrive dit billede.
- Vælg den ønskede enhed i rullemenuen, og indtast den ønskede højde eller bredde i et af felterne.
- Hvis standardindstillingerne er aktiveret, bevares størrelsesforholdene. Hvis du ikke ønsker at modtage dette, skal du fjerne markeringen ved "Hent proportioner".
- Hvis billedets skarphed stadig ikke er tilfredsstillende efter reduktion, skal du vælge indstillingen "Bicubic skarpere" i rullemenuen "Genberegn billede med".
I et andet praktisk tip viser vi dig, hvordan du spejler hele billedet i Photoshop.